Chain Tassel Necklace: Project Instructions
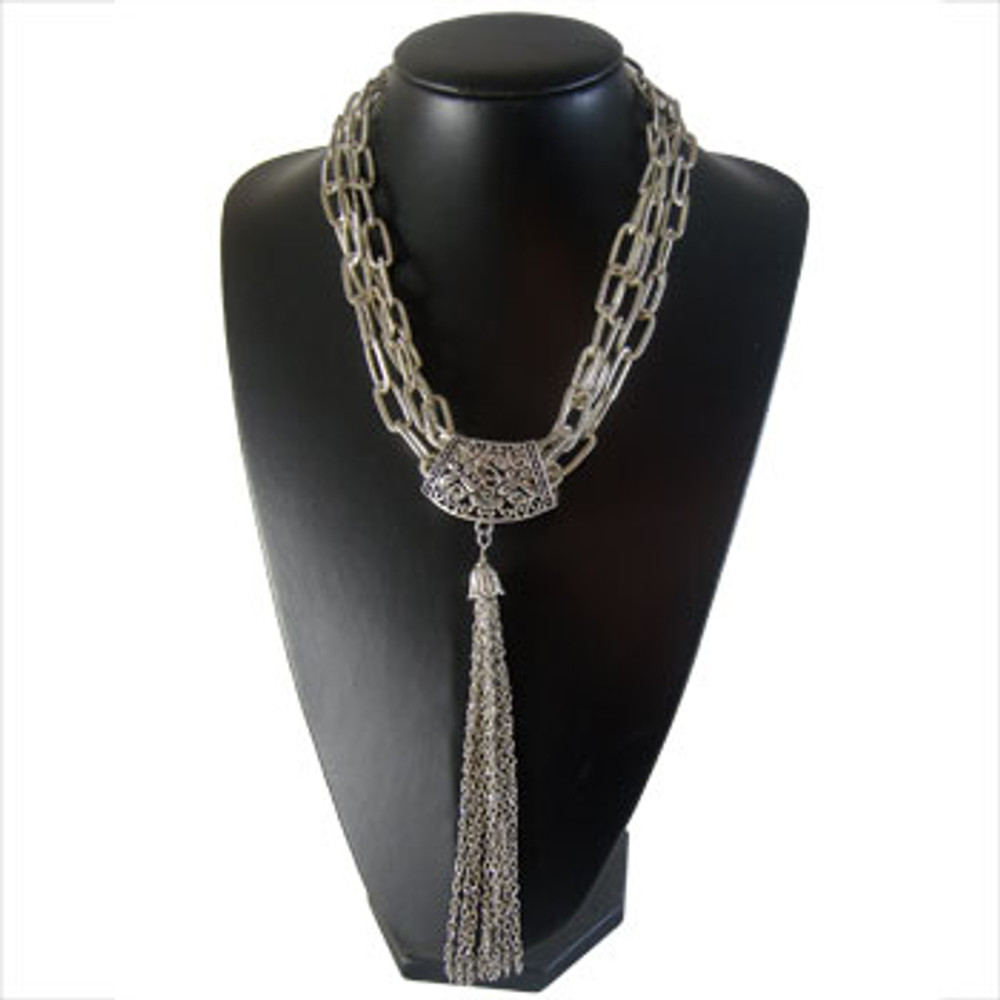
Combining two different types of chain and a large scarf bail, this chunky tassel necklace is a breeze to assemble. Follow our simple instructions to make your own elegant chain tassel necklace!
MATERIALS REQUIRED
- 1m x 4mm thin twisted chain
- 1 x 50mm eye pin
- 1 fairy skirt bead cap
- extra large butterfly scarf bail
- 1 x 6mm strong jump ring
- 1.5m x 20mm patterned rectangular link chain
- 4 x 8mm jump rings
- 1 x large fancy heart parrot clasp
TOOLS REQUIRED
- Twirly Wirlies
- 2 x Crimping Pliers
- Wire Cutters
INSTRUCTIONS
The Tassel
Cut the nickel thin twisted chain into four equal lengths of 25cm each. Open the eye on the eye pin and thread the centre link of each of the pieces through the wire of the eyepin, then close the eye tightly. Thread the other end of the eye pin through the open end of the fairy skirt bead cap and pull tight. Leaving a space of 10mm, cut the excess off the eye pin. Twirl the end using your twirly wirlies.
The Bail
Join the tassel to the extra large butterfly scarf bail with a 6mm jumping then set aside.
The Necklace
By opening the links of the 20mm patterned rectangular link chain, make 3 sections that are:
- 1 x 28 links
- 1 x 29 links
- 1 x 30 links
Open up one of the 8mm jump rings and gather the three sections of chains together. Open a second 8mm jumping and join to the first, then loop through the loop at the bottom of your fancy parrot clasp. Close securely.
Open another of the 8mm jump rings and gather the other end the three chains together. Close securely. Open another 8mm jumping and join to this last one, then close securely.
Thread the extra large bail with tassel attached on and your necklace is now ready to wear!
© www.eurekabeads.com.au These free beading instructions may be used for personal use only [EX06432]
Recent Posts
-
Swarovski Christmas Present Stack Earrings: Project Instructions
This gorgeous project makes use of various sized Swarovski crystal cube beads to create Christmas th …6th Jan 2024 -
Seed Bead Phone Strap: Project Instructions
Create this great phone charm strap made using size 6 seed beads and cute feature beads.MATERIALS RE …11th Sep 2021 -
Seed Bead Necklace: Project Instructions
Create this fun necklace made using size 6 seed beads and cute feature beads.MATERIALS REQUIRED 150 …11th Sep 2021


